Yumi OAT a Step by Step Guide
Follow the instructions below and finish the instructions on creating Yumi OAT.
Fill out the form below, and apply to Yumi to get permission to list on the Yumi Art. Be attentive, leave the principal ID of PLUG or Stoic wallets under question 8.
https://tppkg-ziaaa-aaaal-qatrq-cai.raw.ic0.app/applyform
2. We will inform you that you get permission to create your Yumi OAT.
3. Follow the instructions, create your Yumi OAT, and share the claim page with your community.
1. Apply for permission to use Yumi OAT
Please fill out the form: https://tppkg-ziaaa-aaaal-qatrq-cai.raw.ic0.app/applyform
Contact us: https://discord.gg/HRKqhXfCMx
Our BD staff will attend to you as soon as possible.
After a discussion with our BD staff, we will offer you the whitelist authority to access the Yumi OAT tool as well as the requirements for Yumi OAT launch details.
2. Log in to the back-end address
Currently, only PLUG and Stoic wallets are available, and it needs to be logged in with a whitelisted account.
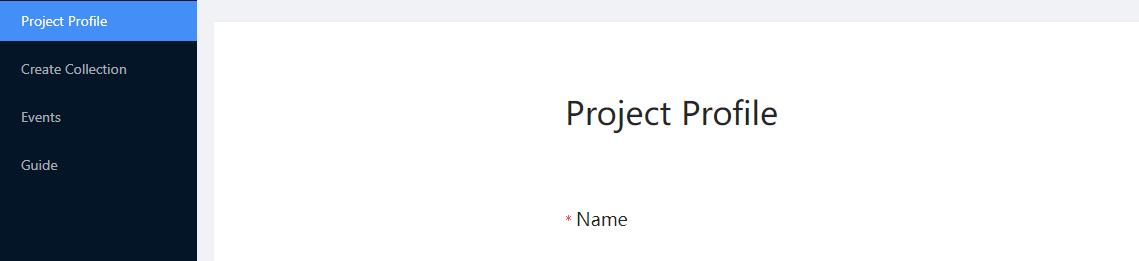
3. Create the Project Profile
Click the Project Profile option on the sidebar to enter the creation page.
The part marked with red * is required.
After filling in the information, click the 【Update】 button at the bottom, and wait for the toast to prompt “Created” to indicate that the creation is successful.
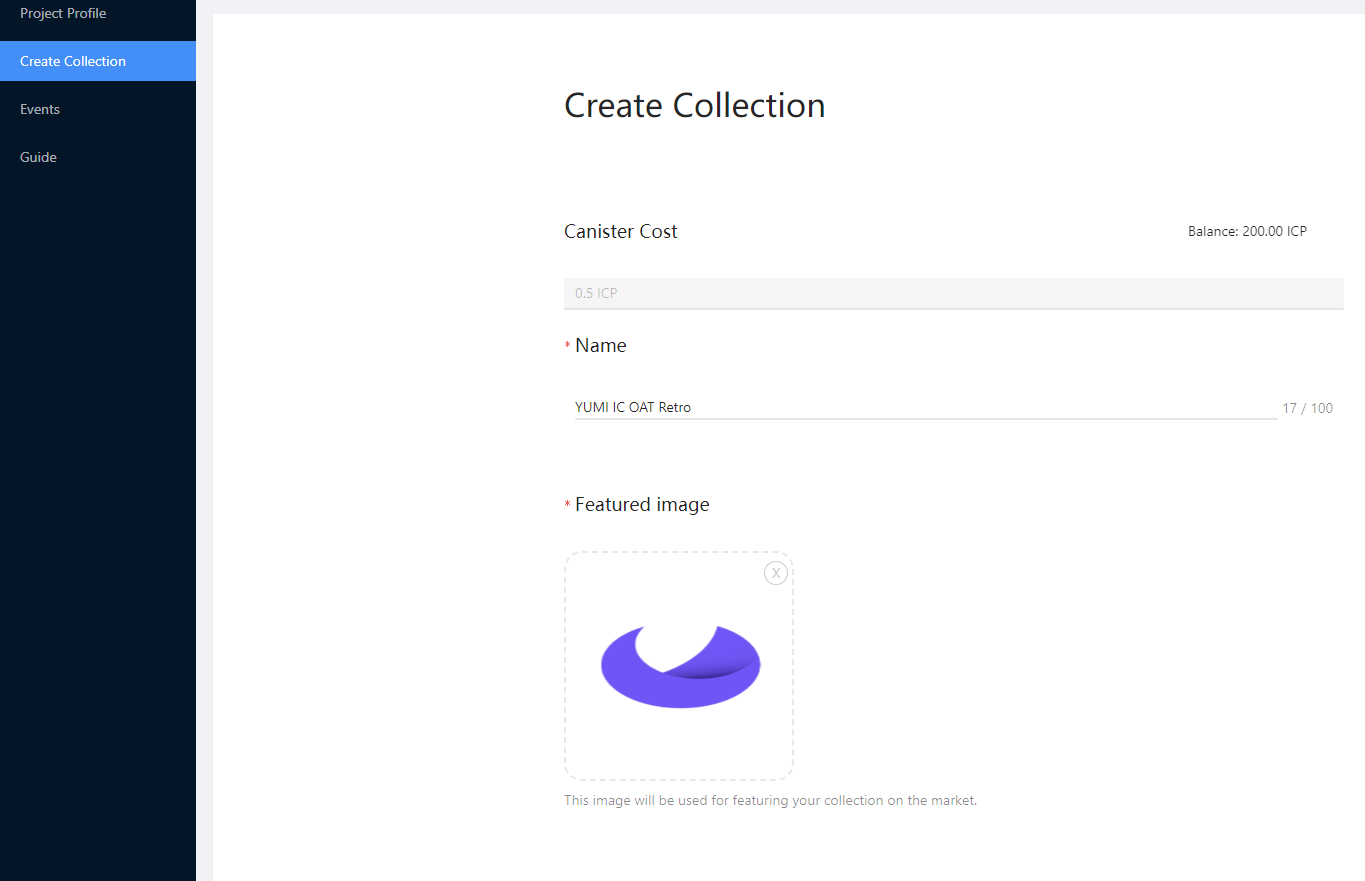
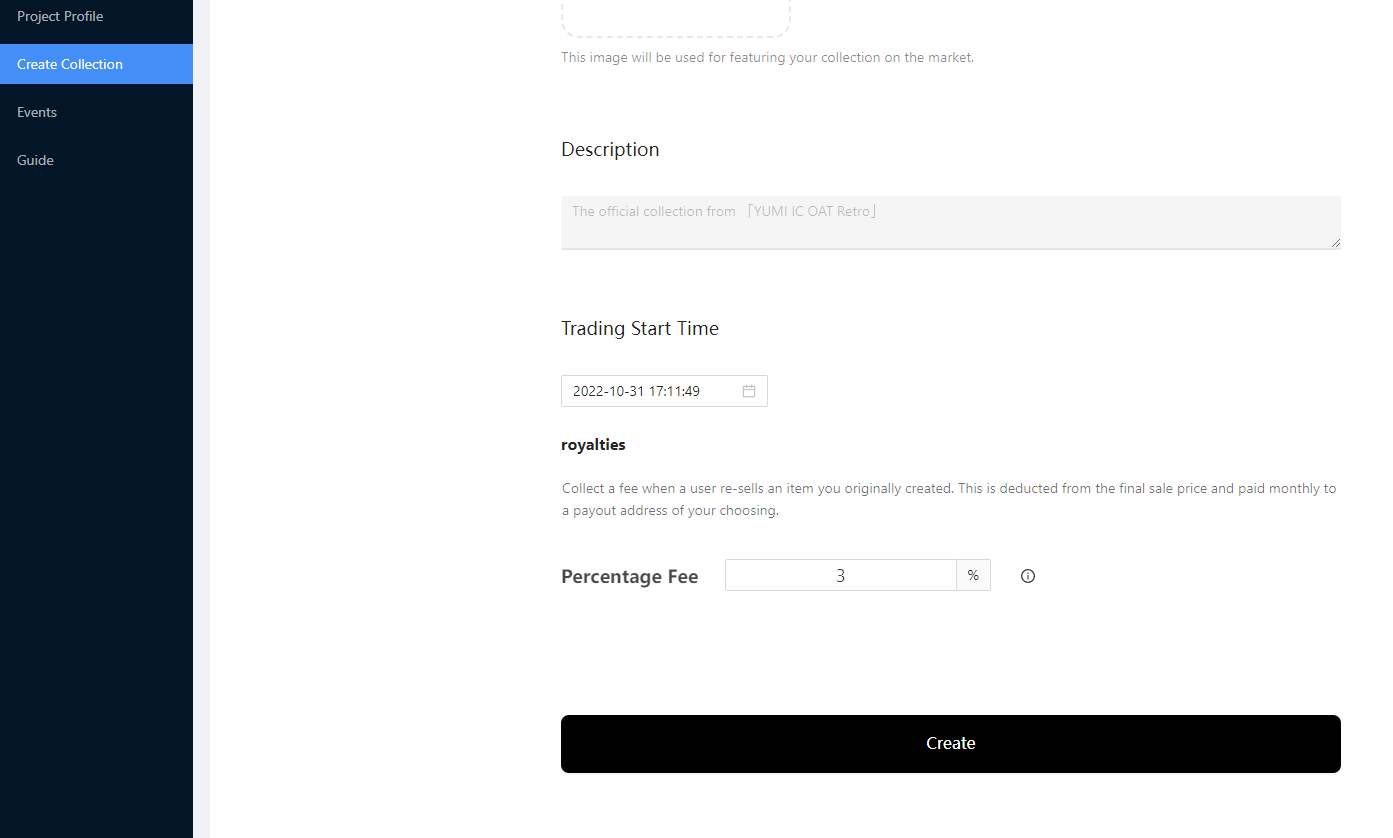
4. Create the Collection
The Collection created in this section will be synchronized on Market, and it will cost 0.51 ICP when creating the collection.
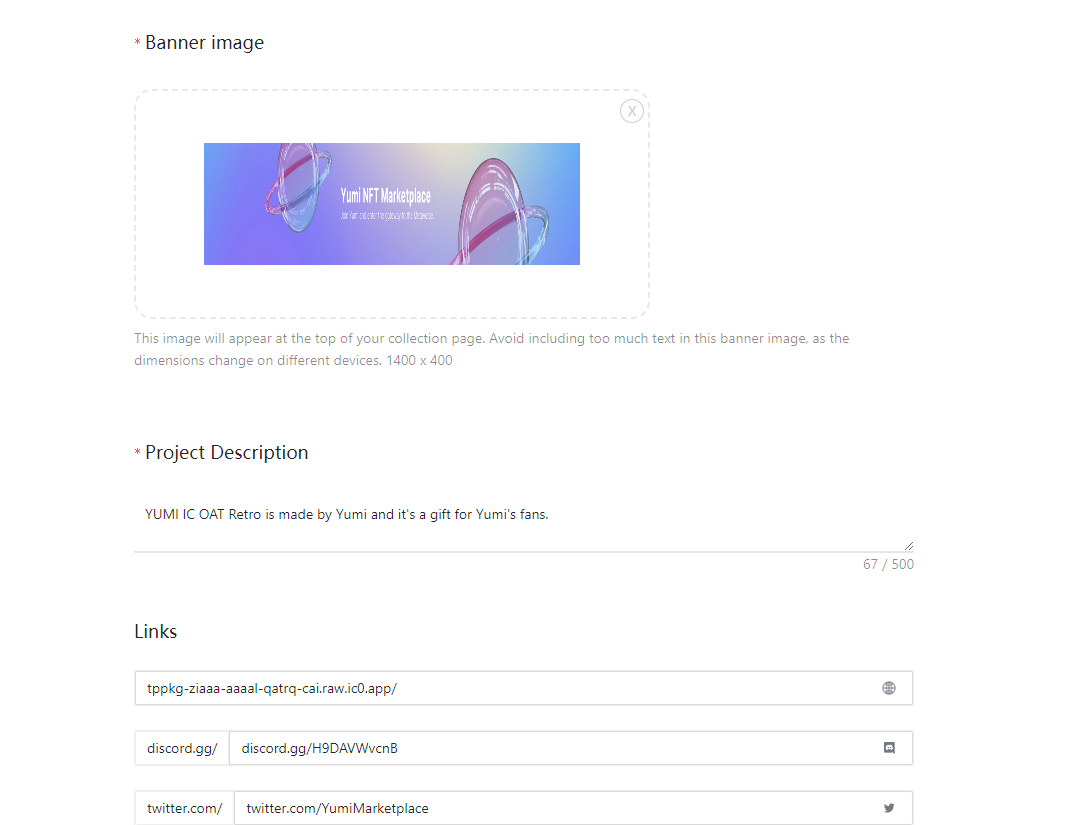
Content customization *(All content has required)
a description: a fixed-format copy.
Trading Start Time: the time of sale in the secondary market
Click the 【Create】 button at the bottom and wait for the toast prompt" success" which means the creation is successful.
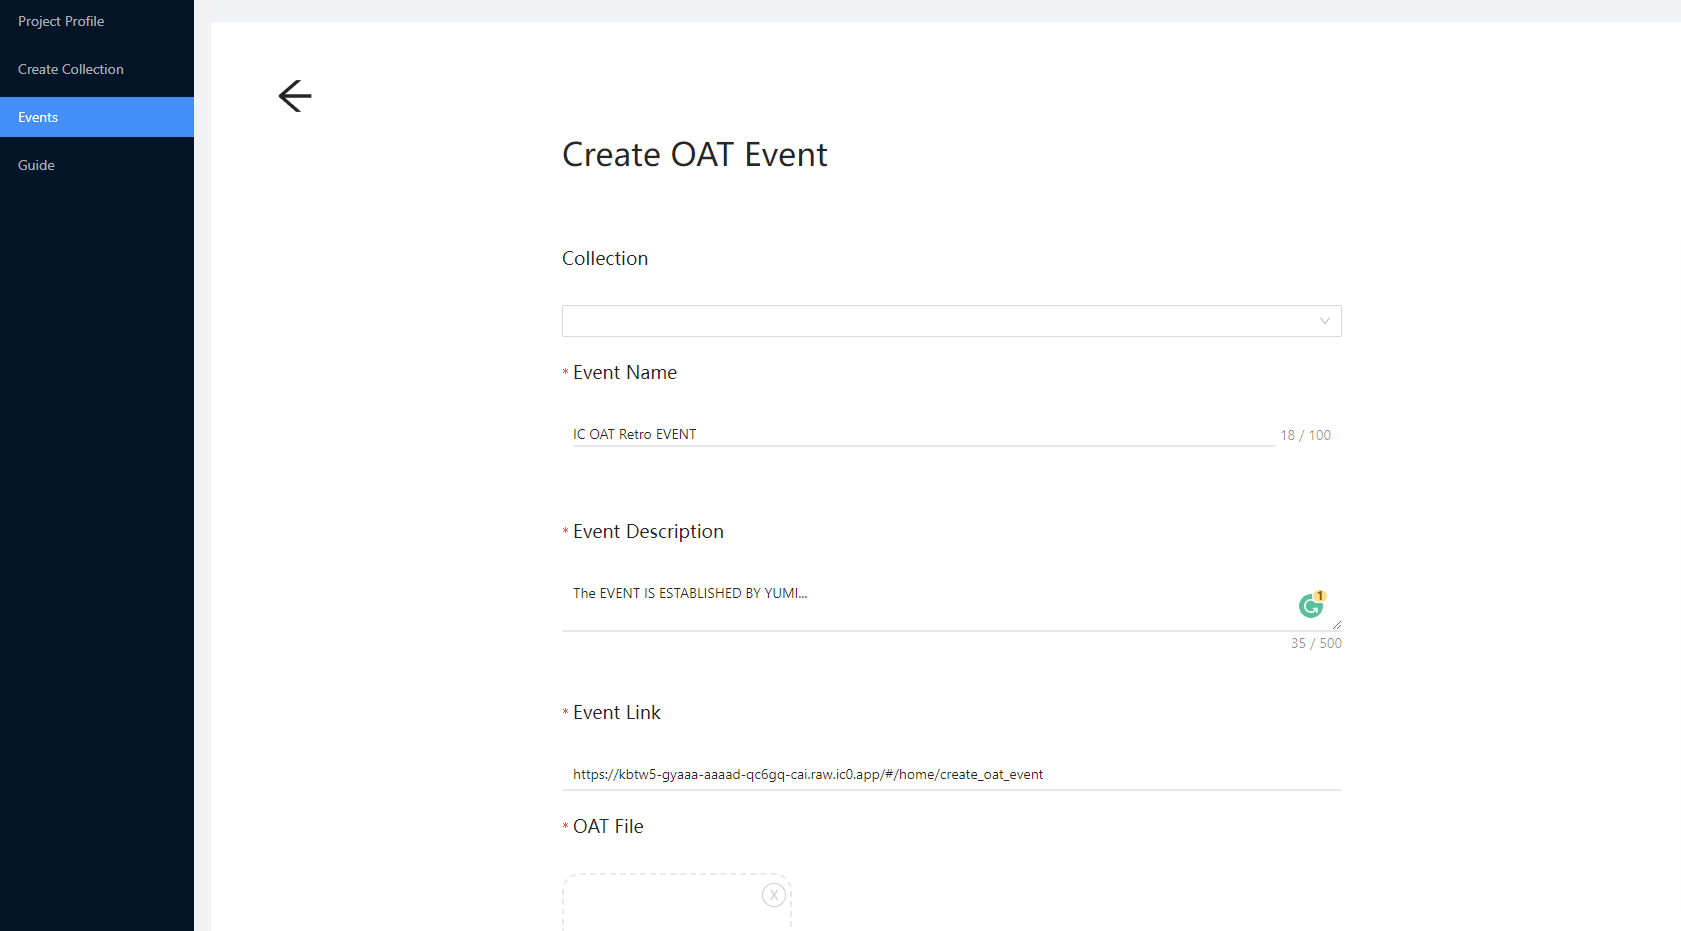
4. Create the Event
Click the 【Events】 option on the sidebar to enter the events list on the page
Click the 【Create Event】 button in the upper right corner to enter the Create Event page
All content is required. After filling in the information, click the 【Create】 button at the bottom and wait for the toast prompt? as shown below, to indicate successful creation
Meaning of each Section
Collection: drop-down list, you can select the collection you just created to store the NFT
Event Name: Event name
Event Description: The description on the event details page
Event Link: The link corresponding to "How to get this OAT" in the event details page
OAT File: NFT material
OAT Name: NFT name
Camp: The total number of NFTs that can be claimed
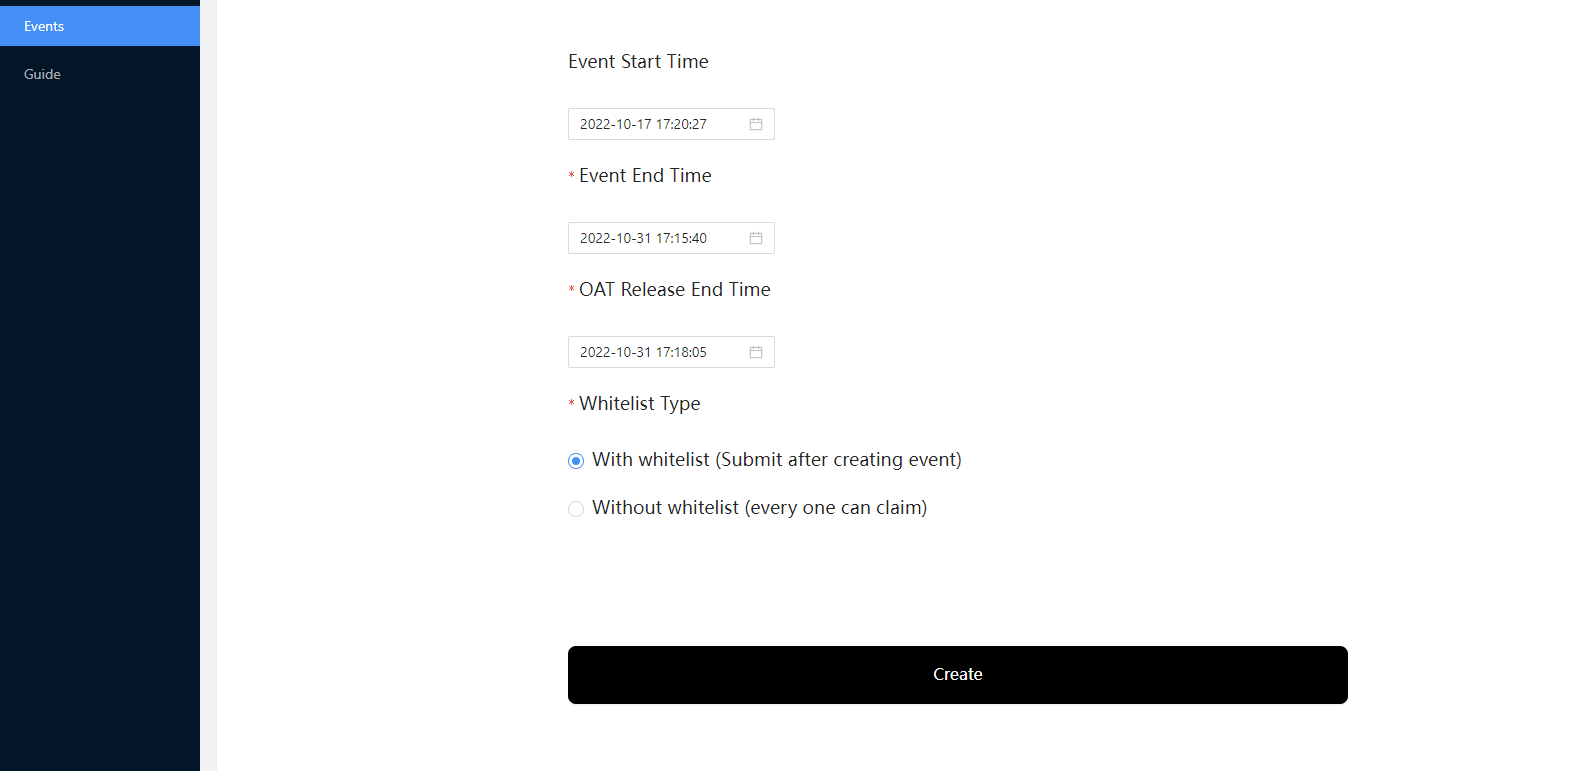
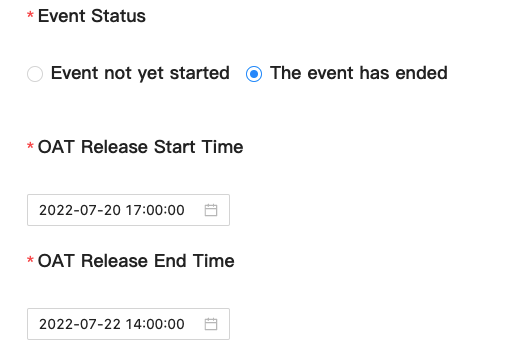
Event Status: Event status selection, the options are "Event not yet started" & "The event has ended"
When selecting "Event not yet started"
Event Start Time: event start time
Event End Time: event end time & release start time
OAT Release End Time: release end time
When selecting "The event has ended"
OAT Release Start Time: release start time
OAT Release End Time: release end time
Whitelist Type
With whitelist: Submit after creating the event
Without a whitelist: everyone can claim
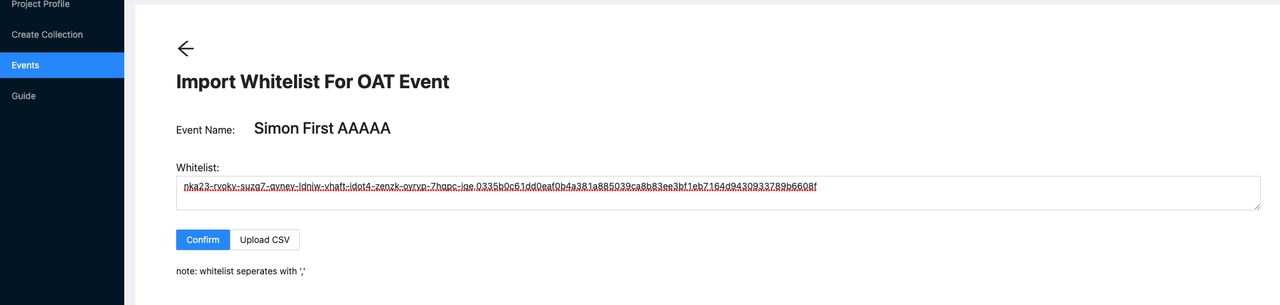
5. Import Whitelist
Click the 【Events】 option on the sidebar to enter the event list page
2. Click on the blue 【Whitelist】 text to enter the whitelist import page
3. There are two ways to import whitelists
You can fill in the PID or AID in the input box, and separate multiple accounts with English commas ","
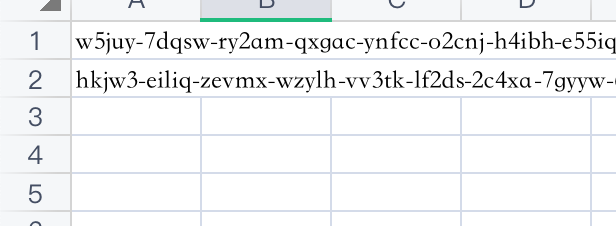
You can also upload in bulk through a CSV file, and fill in an address in each form
4. After the input is completed, click the 【Confirm】 button to confirm. Note: The whitelist can only be added, and the confirmed account cannot be deleted.
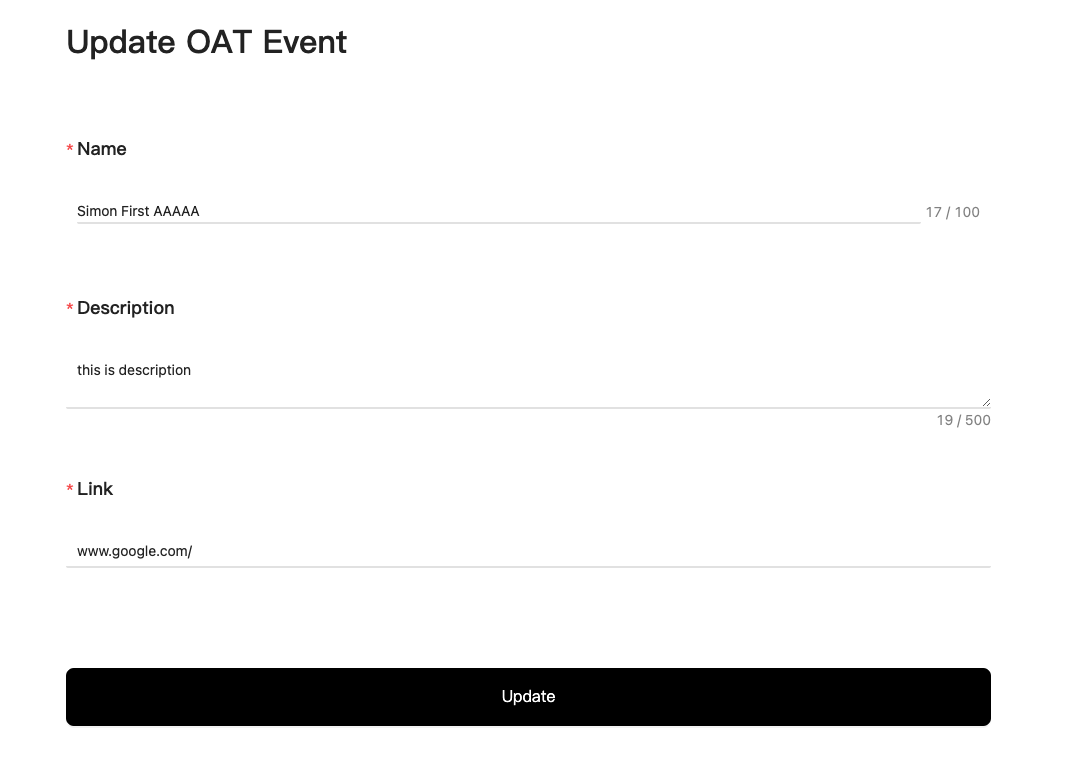
5. Support modifying Project Profile and Event information
6. Modify the Project Profile
Click on the 【Project Profile】 option in the sidebar to edit and update
2. Modify the event information
Click the the【Events】option in the left sidebar
Click the blue 【Event Detail】 to enter the modification page, and click 【Update】 after modification.
Last updated